Data transfer tools
SCP
Use scp to transfer a file or directory from/to ARC systems
Call the scp command from the shell command line. This is available in default installation of Linux, Windows (PowerShell), and MacOS. SCP significantly outperforms GUI-based tools on Windows systems such as MobaXterm and WinSCP.
The basic syntax is scp <source> <destination>. Both the source and destination can be local or remote. When specifying a remote source or destination, you need to provide the hostname and the full path to the file or directory like this (ie. colon separated):
user@host.domain:/path/to/file
ARC clusters share the /home and /projects mountpoints. Therefore, any files you transfer are automatically visible on all clusters.
We recommend to use the host datatransfer.arc.vt.edu to improve the performance of the data transfer.
Note: We strongly recommend using Globus for transferring large data sets as it transfers files in parallel while scp transfers files one at a time and hence does not perform nearly as well.
Example copy from ARC to your computer
In this example we “pull” data onto the local computer (eg. a laptop, workstation or even a shell on another ARC node) from ARC systems. So the <source> uses hostname:filename format and the <destination> is the current working directory which is referenced with a period “.”. Replace myVTpid with your actual username.
scp myVTpid@datatransfer.arc.vt.edu:/home/myVTpid/filename.zip .
Example copy from your computer to ARC
In this example we push a directory dirname and its contents from the local system to a /projects/mygroup/ directory:
scp -r dirname myVTpid@datatransfer.arc.vt.edu:/projects/mygroup/
The “-r” option is for a “recursive” transfer which means the referenced directory and all of its contents will be transferred. The directory structure on the destination will be identical to the source. If the “-r” is not specified, but the source is a directory, then scp will fail with an error like:
scp: omitting directory ‘dirname‘
RSYNC
rsync “a fast, versatile, remote (and local) file-copying tool” is a standard tool on linux and unix system which has a long list of options you can turn on or off to customize the nature of the transfer. It is particularly well-suited for performing a synchronizition where different versions of a data collection reside in two locations because it can minimize the amount of data transferred and being able to resume a partially completed transfer. scp or cp, on the other hand, will always perform an entire copy from source to destination, even if files and directories already exist at the destination.
Best practices for transfers
Package datasets with a large number of files before transferring
If you need to transfer a dataset which has a large number of small files, use tar or zip to package the dataset into a smaller number of larger files. Most tools will process files in a dataset sequentially and there is significant overhead from the OS, network, and storage devices when many small files are transferred this way. A single, large-file transfer, on the other hand, will only incur this overhead latency once and the rest of the time will be spent in high-bandwidth transfers.
For context in these scenarios
“small files” means files smaller than 10MB
“large number of files” means thousands or more: 1000+
This is applicable for any transfer of a large number of small files, even intra-cluster. In many cases, it can be very effective for copying a data set (for example AI/ML training data) to local scratch space on compute nodes. See this example for more details.
Parallelize data transfers when possible
Most, if not all, of ARC’s networked storage systems (eg. /home, /scratch, /projects) are capable of managing many simultaneous data flows such that a single data transfer has much lower performance than the aggregate of several streams running in parallel. Standard tools like cp, mv, scp, and rsync will process the source arguments in serial which means only one file is copied at a time. To engage the full bandwidth of the networked storage system, we need to parallelize or use multiple simultaneous transfers.
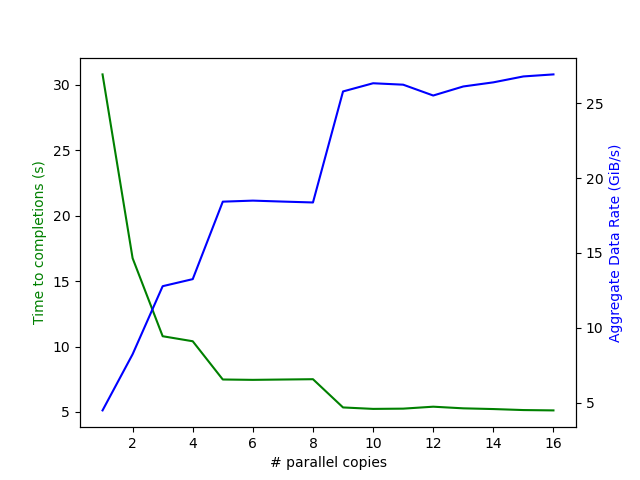
In this example benchmark, GNU parallel is used to launch a varying number of simultaneous copies from /scratch to the $TMPNVME on a DGX compute node. Performance improves dramatically by parallelizing, but does plateau at around eight simultaneous copies.
rclone
Login to OnDemand: https://ood.arc.vt.edu
Start Remote Desktop
Start shell via link in the job card
tmux ls
Start tmux for job. For example, this is for job with id 447439:
tmux a -t OOD.tmux.447439
module load rclone
Now follow: https://rclone.org/drive/
Example: Config rclone for metfaces
As an example, to download the metfaces dataset (big, so beware):
rclone config
> n
> metfaces
storage> 11
client_id> {blank}
client_secret> {blank}
scope> 1
Next is folder id, for instance for metfaces: https://drive.google.com/drive/folders/1w-Os4uERBmXwCm7Oo_kW6X3Sd2YHpJMC
root_folder_id>1w-Os4uERBmXwCm7Oo_kW6X3Sd2YHpJMC
service_account_file> {blank}
service_account_file> {blank}
Y/n> y
Now, copy the address shown “http://127.0.0.1:53682/auth” for instance.
Go to the Remote Desktop, start Firefox, and head to that web address.
Go back to the rclone config
Y/n> n
Y/e/d> y
/n/d/r/c/s/q> q
To start using the rclone you just setup, you can do for instance:
Get a listing of files
rclone ls metfaces:
Download the data in the metfaces google drive to current dir
rclone copy metfaces: ./
FileZilla
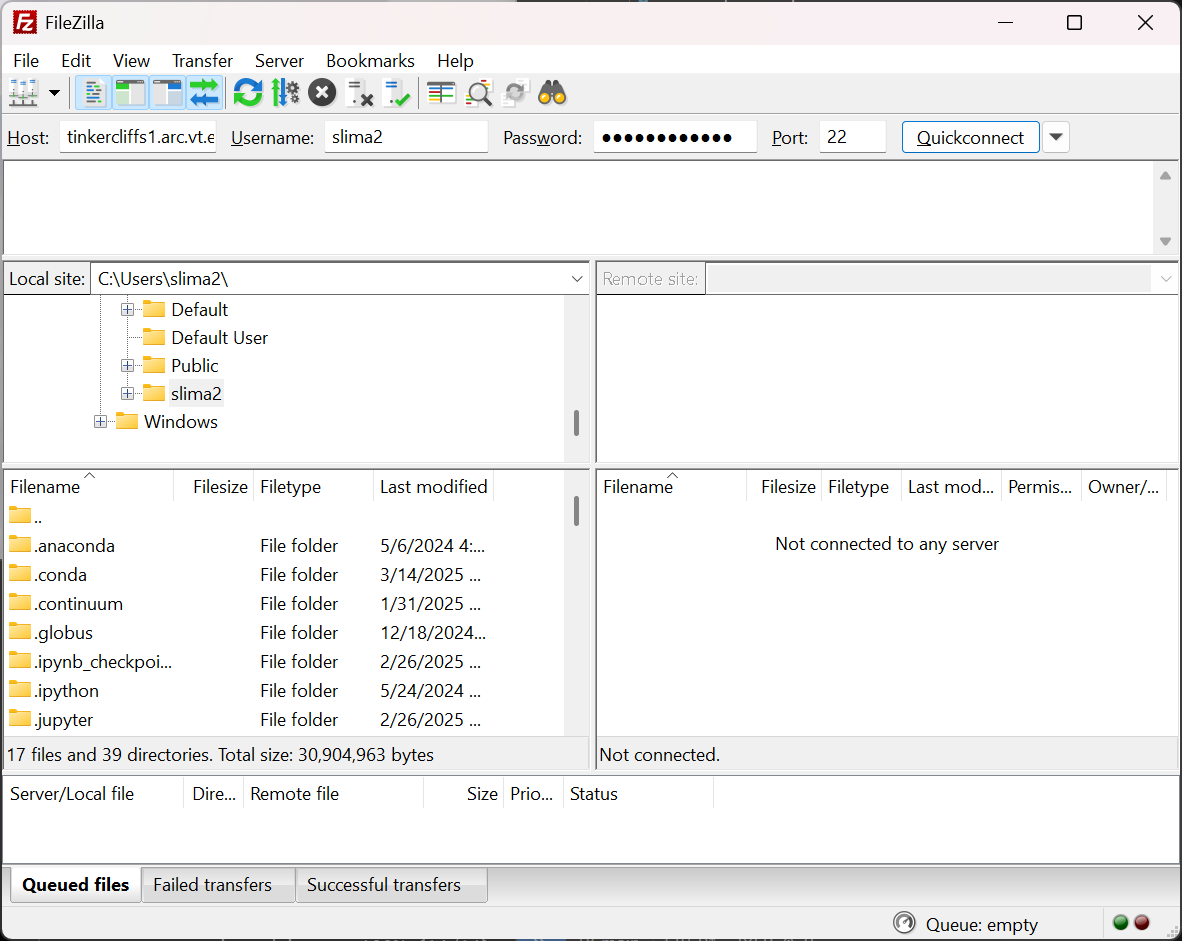
FileZilla is a popular tool with a more intuitive user interface for transferring data. With FileZilla installed, the application can securely move data in and out of ARC’s storage systems.
Example
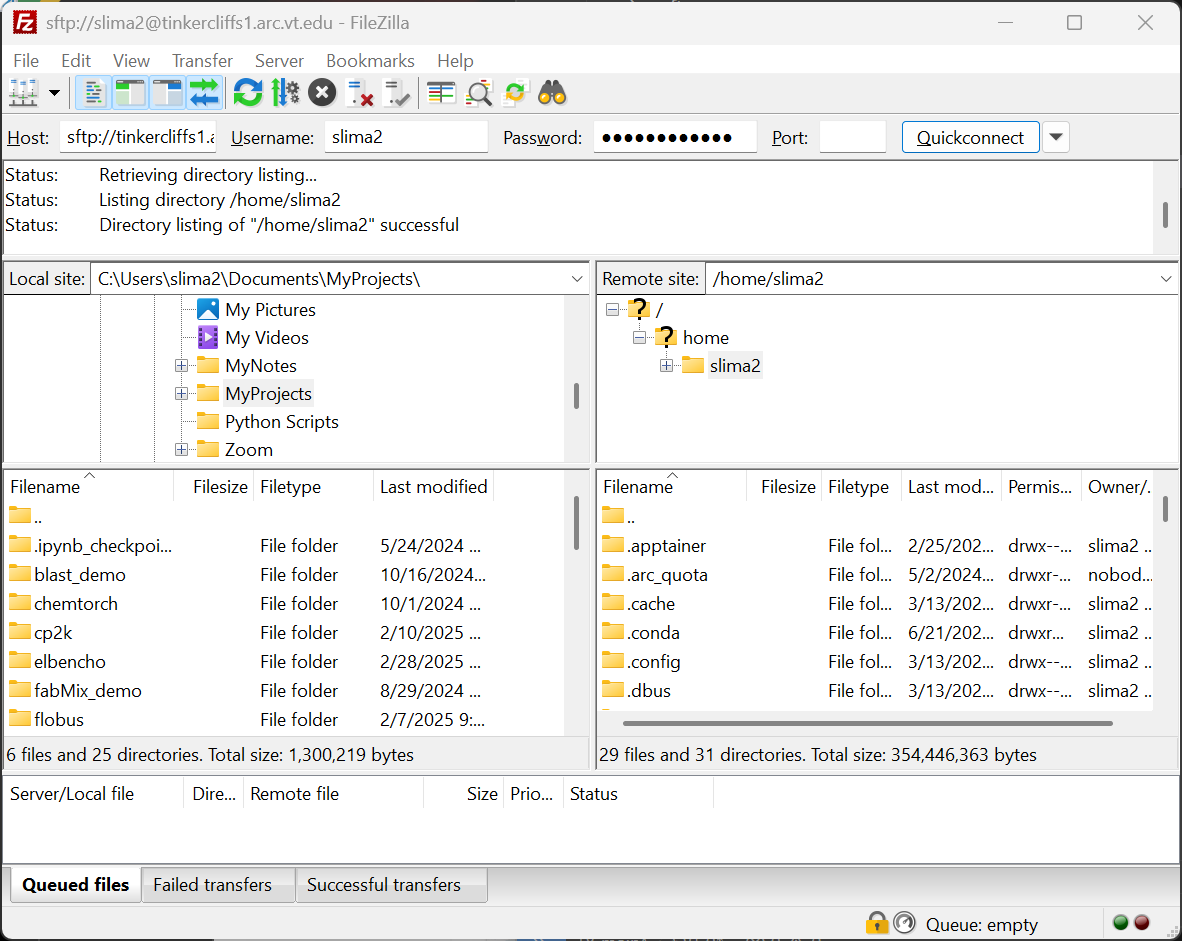
Use the quickconnect bar to setup the local and remote systems. The host can be datatransfer.arc.vt.edu (recommended) or any login node of the clusters. Enter your PID username and your password, and use port 22.
After entering the fields, complete 2 Factor Authentication (2FA) required for making the secure connection. Once the connection is made, transfers can be made using the interface.
Globus
ARC purchased a High Assurance Subscription to Globus and established a Globus Data Transfer Node globus.arc.vt.edu. Detailed documentation about using Globus in ARC is available here.